Has anyone decorated their Magic Bands? Please show us the pictures!

Our magic bands just arrived yesterday, woohoo!! And of course, I quickly tried mine on. It turns out that I need to be able to wear it on the last two holes of the colored section of the band. However, with the excess gray bit overlapping, it rubs a little against the bone in my wrist. So I'm considering pulling off the gray stuff. But I have two concerns that I was hoping you guys might could help me with! :)

#1 - After tearing off the gray stuff, are the edges of the colored section rough against the skin? I've read that you can file down the edges or use a lighter...anyone done this? How does it look? Have pictures??

#2 - Part of me kind of likes the contrasting look of the gray edges against the pink of the band. Does anyone have a good picture of a band with the gray part torn off (preferably of a pink one, but doesn't have to be) that you're willing to share?

I don't know why I'm so anxious about this. It seems like a stupid thing to worry about but I guess it's just knowing that once I tear the gray part off, it can never go back on!!! I'm terrified of irreversible decisions, haha! :blush: The other option I'm considering is to just trim the length of the gray part down to the last hole to eliminate the overlap.

p.s. We're going to Michael's this weekend for supplies, so I'll post pictures once that's done!
 
Has anyone successfully used mod Podge to decoupage items (paper or stickers) to the band?

Where would I get Stitch tattoos?

Anyone thought of decoupaging or somehow attaching a cell number to the band (especially kiddos) in case it's lost?
 
Has anyone successfully used mod Podge to decoupage items (paper or stickers) to the band?

Where would I get Stitch tattoos?

Anyone thought of decoupaging or somehow attaching a cell number to the band (especially kiddos) in case it's lost?

I found tattoo paper and I am printing my own for Jack Skellington because I cannot find them anywhere. It's working out nicely, though I haven't gotten my bands yet to test them on there, it does work well on the kids. I also designed tattoos for our phone numbers to put on the boys arms while we're at the park and printed them. If I can figure out how to post a picture, I can show you. They are simple though. DS2's is a picture of Dusty and it says "if I'm flying solo, please call: (our phone number)
 
I'm sorry, I just realized you meant if the band was lost, though I'm sure you could use the tattoo paper for that, or even a sharpie with clear nail polish over it. :thumbsup2


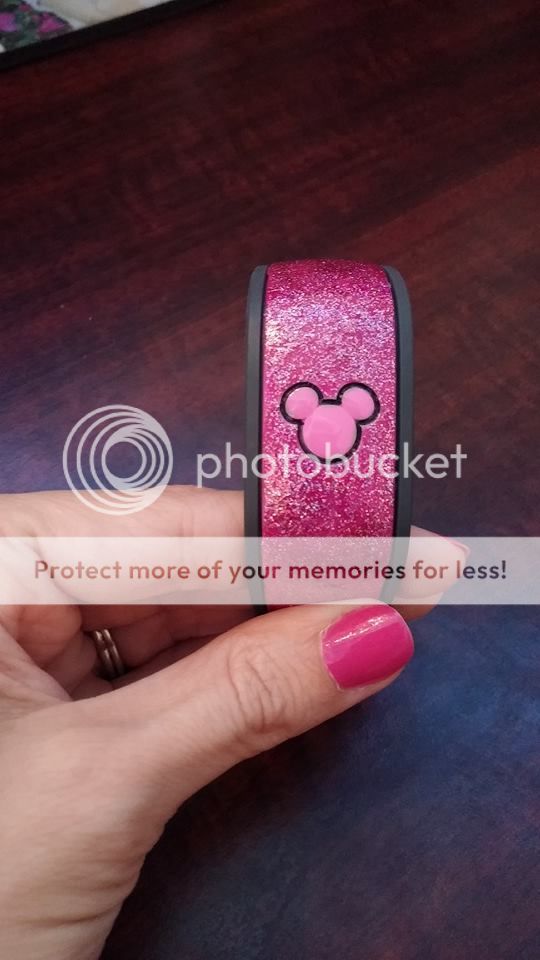
I finally got my Magic Band finished yesterday, which is good because we are leaving this afternoon!! :love:

magicband.jpg


I used one clear top/base coat over the whole band, then 2-3 coats of a glittery pink (some parts needed an extra coat for complete coverage), then another clear top/base coat. The outline of the mickey head was originally done in a grey nail polish but I didn't like the way it looked so I took a fine point sharpie pen and outlined it that way. The sharpie didn't hold up too well with the top coat so I put another layer of it on top of the last top coat.

The pictures don't do it justice. In the sun it is VERY sparkly! I want to add a layer of glow in the dark paint to the mickey in just a bit.
 
I don't know why I'm so anxious about this. It seems like a stupid thing to worry about but I guess it's just knowing that once I tear the gray part off, it can never go back on!!! I'm terrified of irreversible decisions, haha! :blush: The other option I'm considering is to just trim the length of the gray part down to the last hole to eliminate the overlap.

p.s. We're going to Michael's this weekend for supplies, so I'll post pictures once that's done!

I always trim my bands down so that only the last two holes of the grey part remain. I use a pair of scissors for the initial cut and then fingernail clippers to round off the edge of the edge a little. It works really well that way. :)


Finally photographed all my current bands and cropped them into one convenient photo! http://s1329.photobucket.com/user/mgszoke/media/imagejpg1_zps61b26068.jpg.html The Nightmare before Christmas and the castle with Jiminy and fireworks are mine, Mr. incredible is for my dad, Olaf for my mom, Indiana Jones and R2D2 are my husband's, the castle with tink and the partners statue is for a friend traveling with us, and finally the Epcot logos is my ap band. We just booked a split stay January for 4, so that means 8 more bands to paint! So far, out of the eight, there are already plans for: another castle, tigger, a variation on the Epcot on, Mickey and small world. I have until the end of December to plan. All bands are acrylic paint, no base coat, then a brush on (not spray) acrylic gloss varnish. They are flexible, no cracks, and have held up pretty well so far wearing them around the house and to work (an elementary school teacher can get away with wearing a magic band as a bracelet).
I've been struggling to find the right "top coat" that has the look I'm looking for and doesn't crack. Sounds and looks like you've nailed it. Could you share the name brand of the acrylic gloss varnish you used and maybe where to find it? Your bands look GREAT!
 
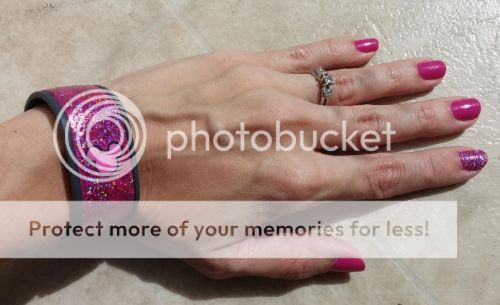
Got a better picture of my sparkly MB in the sunlight. It's definitely much prettier when it's in direct sunlight rather than being indoors.

dc5edf8b-e5f3-4820-bb7b-565a1cfe67d2.jpg


I also painted my index finger to match, since that's the one that I'll use on the scanners. I had seen where Ashley from "See Ya Reel Soon" put the accent on her index finger instead of the ring finger and thought that was a cute idea!
 
I always trim my bands down so that only the last two holes of the grey part remain. I use a pair of scissors for the initial cut and then fingernail clippers to round off the edge of the edge a little. It works really well that way. :)

Thanks!! That's so good to know. I think I'm leaning towards doing that.

Also, off topic...purvislets, your wedding ring looks very similar to mine! You've got good taste! :thumbsup2
 
I've been struggling to find the right "top coat" that has the look I'm looking for and doesn't crack. Sounds and looks like you've nailed it. Could you share the name brand of the acrylic gloss varnish you used and maybe where to find it? Your bands look GREAT!
I've been using Americana DuraClear gloss varnish. I bought it at Michael's. It comes in a 2 oz bottle, but a little bit goes a long way. Good luck!
 
#2 - Part of me kind of likes the contrasting look of the gray edges against the pink of the band. Does anyone have a good picture of a band with the gray part torn off (preferably of a pink one, but doesn't have to be) that you're willing to share?

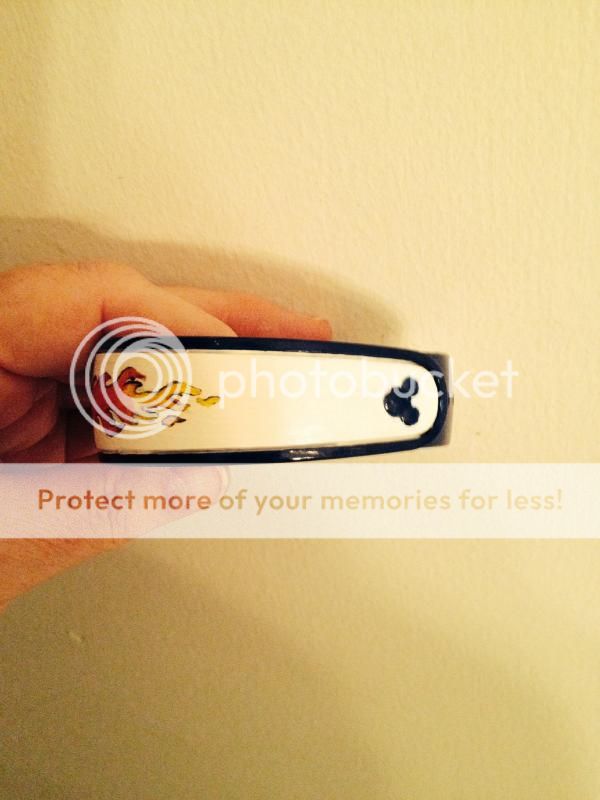
I had my daughter put hers on. This is the pink with the gray removed. I used a fine grit sandpaper to remove the barbs from the edges after the gray was removed.

 
Thanks!! That's so good to know. I think I'm leaning towards doing that.

Also, off topic...purvislets, your wedding ring looks very similar to mine! You've got good taste! :thumbsup2

Thank you!! My husband picked them out, actually. They are my replacement set for our 10 year anniversary. Our son flushed my original set a few years back, but these are very similar to those. I love them!
 
I haven't posted on DIS in ages, but this is my MagicBand from our trip for Harambe Nights in August.

fthdls.jpg


I'm a HUGE Lion King fan, and I had to have a TLK band for the event. I got a lot of compliments on it, and even had two girls chase me down at Epcot to tell me she loved it and saw it on Instagram. She dragged me off to show it to her mom too lol.

I started with a red band, and then I did two coats of Sally Hansen Double Duty Base and Top Coat, let it dry overnight, and then painted the design with acrylic paint. I let that dry overnight and then did the gold glitter polish and let it dry overnight. The next evening, I added two coats of the same base/top coat, letting it dry completely between the coats. There was no cracking in the paint at all during the trip, and it still looks good two months later. :)
 

GET A DISNEY VACATION QUOTE

Dreams Unlimited Travel is committed to providing you with the very best vacation planning experience possible. Our Vacation Planners are experts and will share their honest advice to help you have a magical vacation.

Let us help you with your next Disney Vacation!


facebook twitter
Top